You bought or made a set of Lightroom presets, they arrived as .xmp files, and now you are staring at your iPhone wondering how to actually use them. You are not doing anything wrong. Getting XMP presets onto an iPhone has always been more fiddly than it should be.
This guide explains why, walks through the official Lightroom route step by step, and shows you how to skip the whole conversion dance if you shoot Apple ProRAW.
What an XMP preset actually is
An .xmp file is not a photo. It is a small text file that lists a set of Lightroom adjustments: exposure, contrast, white balance, the tone curve, color mixing, split toning, grain, and so on. When you apply a preset, Lightroom reads those values and lays them over whatever image you have open.
That detail is the root of the iPhone headache. iOS has no built-in idea of what to do with a loose .xmp file, so for years the only way to move a preset onto a phone was to bake it into an image first.
Why XMP presets are awkward on iPhone
- For a long time, Lightroom on iPhone would only accept presets baked into a
.dngfile. So preset makers told you to convert your.xmpto.dngon a desktop computer before you could use it on your phone. - Adobe later added direct
.xmpimport to Lightroom Mobile in a 2024 update, which helped, but it still trips people up: you need an Adobe account, you must not unzip the preset pack first, and the import button is buried under Presets, then Yours, then a three-dots menu. - Either way you are committed to working inside Lightroom and signing in to Adobe.
None of this is hard once you know the steps. Here they are.
Option 1: Import XMP into Lightroom Mobile (the official way)
- Download the preset pack to your iPhone and save it to the Files app. If it came as a zip, leave it zipped. Lightroom reads it as is.
- Install the Adobe Lightroom app and sign in with an Adobe account.
- Open any photo in Lightroom, tap Edit, then tap Presets along the bottom.
- Tap the Yours tab, then the three-dots menu, then Import Presets.
- Select your downloaded files. Your presets now live under Yours, and you can tap any of them to apply it to a photo.
Two things that catch people out
Unzipping the pack before importing (leave it zipped), and looking under the wrong tab. It has to be Presets, then Yours, not Recommended or Premium.
Option 2: Convert XMP to DNG on a computer (the old way)
If you are on an older version of Lightroom, or a preset only ships as a DNG, the original method still works. It needs a desktop copy of Lightroom.
- On desktop Lightroom Classic or Lightroom CC, open any RAW or DNG photo and apply just the preset you want.
- Export that photo as a DNG file.
- Get the DNG onto your iPhone with AirDrop, iCloud, or email, and import it into Lightroom Mobile.
- With the DNG selected, save its settings as a new preset.
It works, but you need a computer and the desktop app, which rather defeats the point of editing on your phone.
Option 3: Skip Lightroom entirely (if you shoot ProRAW)
If you shoot in Apple ProRAW, there is a more direct path. RAWCraft is an iPhone app that imports your .xmp presets straight from the Files app and applies them to your ProRAW photos. No Adobe account, no DNG conversion, no desktop step.
It reproduces the look your preset describes: the color moves, the tone curve, and film touches like grain, vignette, and clarity. You can then dial the strength up or down and export at full quality in Display P3.
To be straight with you about the limits: RAWCraft does not reproduce local adjustments such as masks or brush edits, or lens and geometry corrections. It is built for the overall look, applied to a ProRAW photo, done entirely on the phone.
- Capture in ProRAW (Settings, Camera, Formats, ProRAW). ProRAW needs an iPhone 12 Pro or newer.
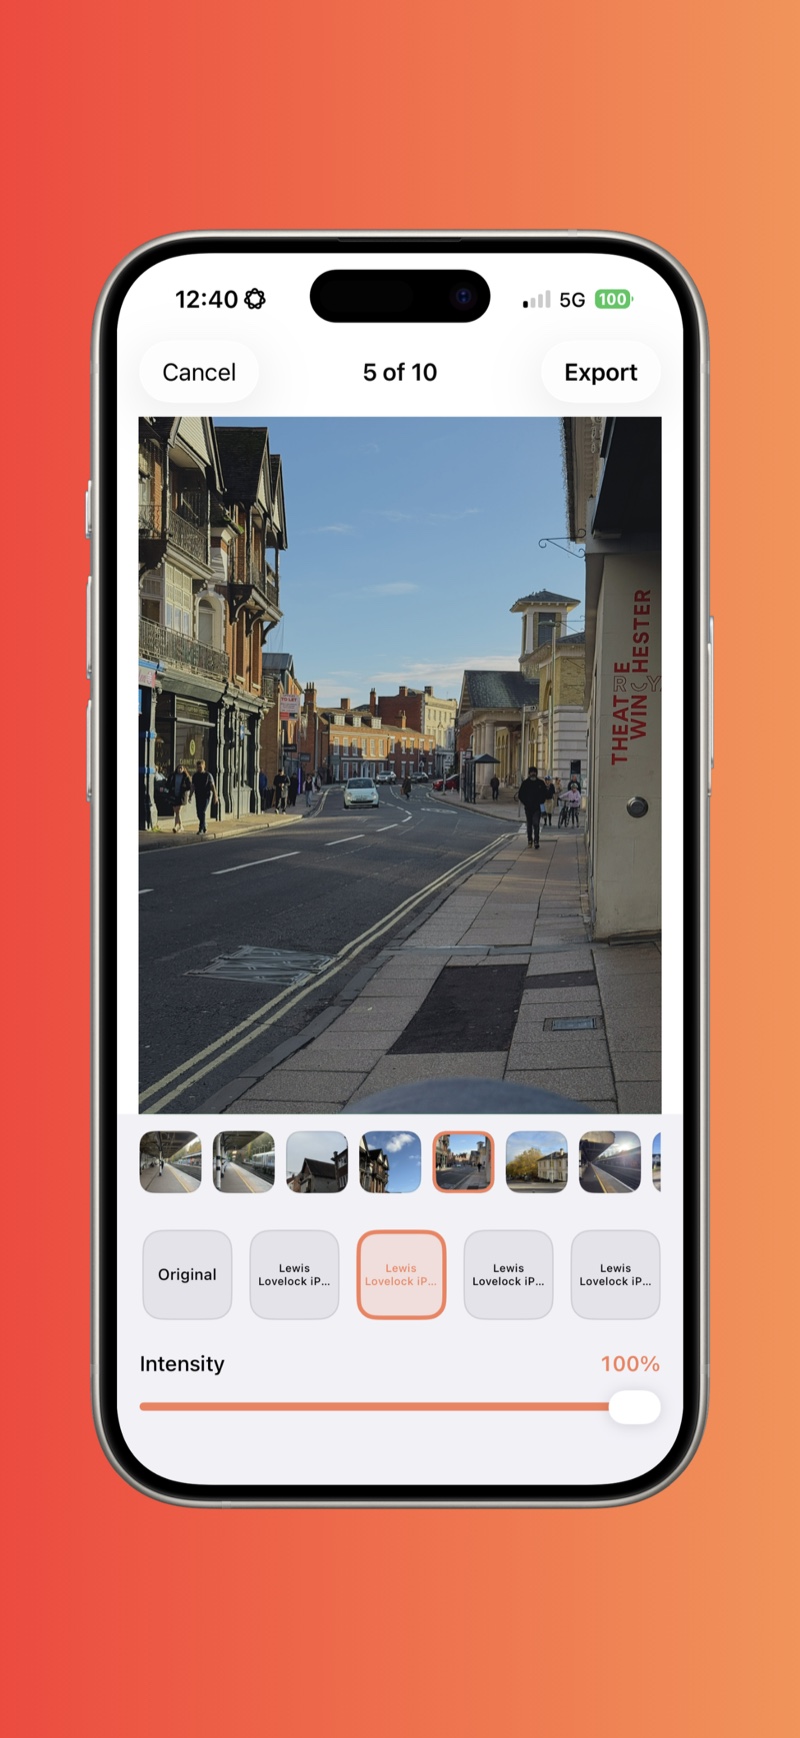
- In RAWCraft, open the LUTs tab and import your
.xmpfile from Files or iCloud Drive. - Open a ProRAW photo, tap your preset, and adjust the intensity until it looks right.
- Export. Your original ProRAW is never changed.
RAWCraft is a one-time $14.99 with a free export so you can try it first. It is not a subscription.
So which option should you use?
A quick rule of thumb:
- You live in Lightroom and shoot in any format: use Option 1 and import your XMP into Lightroom Mobile.
- You only have a desktop and a stubborn old preset: Option 2 still works.
- You shoot ProRAW and want it done on your phone without an Adobe login: that is exactly what RAWCraft is for.
Whichever route you take, your presets are yours to keep. The point is simply to get the look you paid for onto the photos you actually shot.