Search for LUTs on iPhone and almost everything you find is about video. If you just want to drop a .cube look onto a photo and save it at full quality, the advice is surprisingly thin.
Here is the whole process, from getting the file onto your phone through to grading a full set and fixing a LUT that looks wrong.
What is a .cube file?
A .cube file is a color recipe. It remaps the colors in your photo to a specific look, like a film stock or a cinematic grade, without touching the content of the image. It is the standard format used by DaVinci Resolve, Premiere, and Photoshop, so a .cube made anywhere works everywhere. If you want the longer version, see What is a LUT?
Inside, it is plain text. A TITLE line names the look, LUT_3D_SIZE gives the grid size (17, 33, and 65 are the common ones), and then come the color samples: one row of three numbers per grid point, so a 33-point LUT is 35,937 rows. Lines starting with # are comments. RAWCraft reads any grid size from 2 to 128, files written on Windows or Mac alike, and ignores keywords it does not know, so almost any .cube you are handed will import. The one kind it refuses is a 1D LUT, covered further down.
Why it is awkward on iPhone
Most apps that mention LUTs are video editors, and the ones that do photos often bury the feature or only work on regular JPEGs. For the best results you want an app that takes a standard .cube file and applies it to a full-quality photo, ideally an Apple ProRAW one, where there is the most color to work with. If you want to weigh up the options first, here is an honest rundown of the LUT apps for iPhone photos.
How to import .cube files on iPhone
Importing a .cube LUT on iPhone is two steps: first get the file into the Files app (AirDrop it from a computer, download it in Safari, or drop it in iCloud Drive), then import it into an app that reads .cube LUTs, such as RAWCraft, straight from Files or iCloud Drive. iOS has no system-wide LUT library, so the LUT lives inside whichever app you import it into. The two sections below cover each part in turn, then applying the look and exporting.
Step 1: get the .cube file onto your iPhone
A .cube file is just a file, and iOS handles it fine once you know where to put it:
- Downloaded on the phone? Safari saves it to the Files app, usually under Downloads. Packs almost always arrive as a zip, and tapping the zip in Files extracts it on the spot. Nothing extra to install.
- On your computer? AirDrop the files to your iPhone, or drop them in iCloud Drive, Dropbox, or Google Drive and they appear in the Files app.
- Made it yourself? A
.cubeyou exported from DaVinci Resolve or Photoshop is the same standard file. Get it to Files by either route above and it imports like any other.
Some packs include several sizes of the same look, a 17-point and a 33-point version of the same file. Take the 33 and move on. What is a LUT? explains when the number of points actually matters.
One thing worth knowing before you start: a lot of the .cube files in circulation were made for video, and a few of those will look plainly wrong on a photo. There is a section below on how to recognize what went wrong and fix it, and what is a LUT covers how to spot one from its filename before you apply it.
Wherever they land, the point is the same: if you can see the .cube files in the Files app, you are ready.
Step 2: apply it with RAWCraft
- Open RAWCraft, go to the LUTs tab, and import the
.cubefile from Files or iCloud Drive. You can select many.cubefiles in one go, then organize them into folders inside the app. They join the 10 built-in looks that ship with RAWCraft, so your library is part what you bring and part what comes with the app. - Open a photo, tap the look to apply it, and slide the intensity until it feels right.
- Every photo keeps its own look and strength. Nothing carries forward from the last photo you edited, so a shot you have not touched stays ungraded.
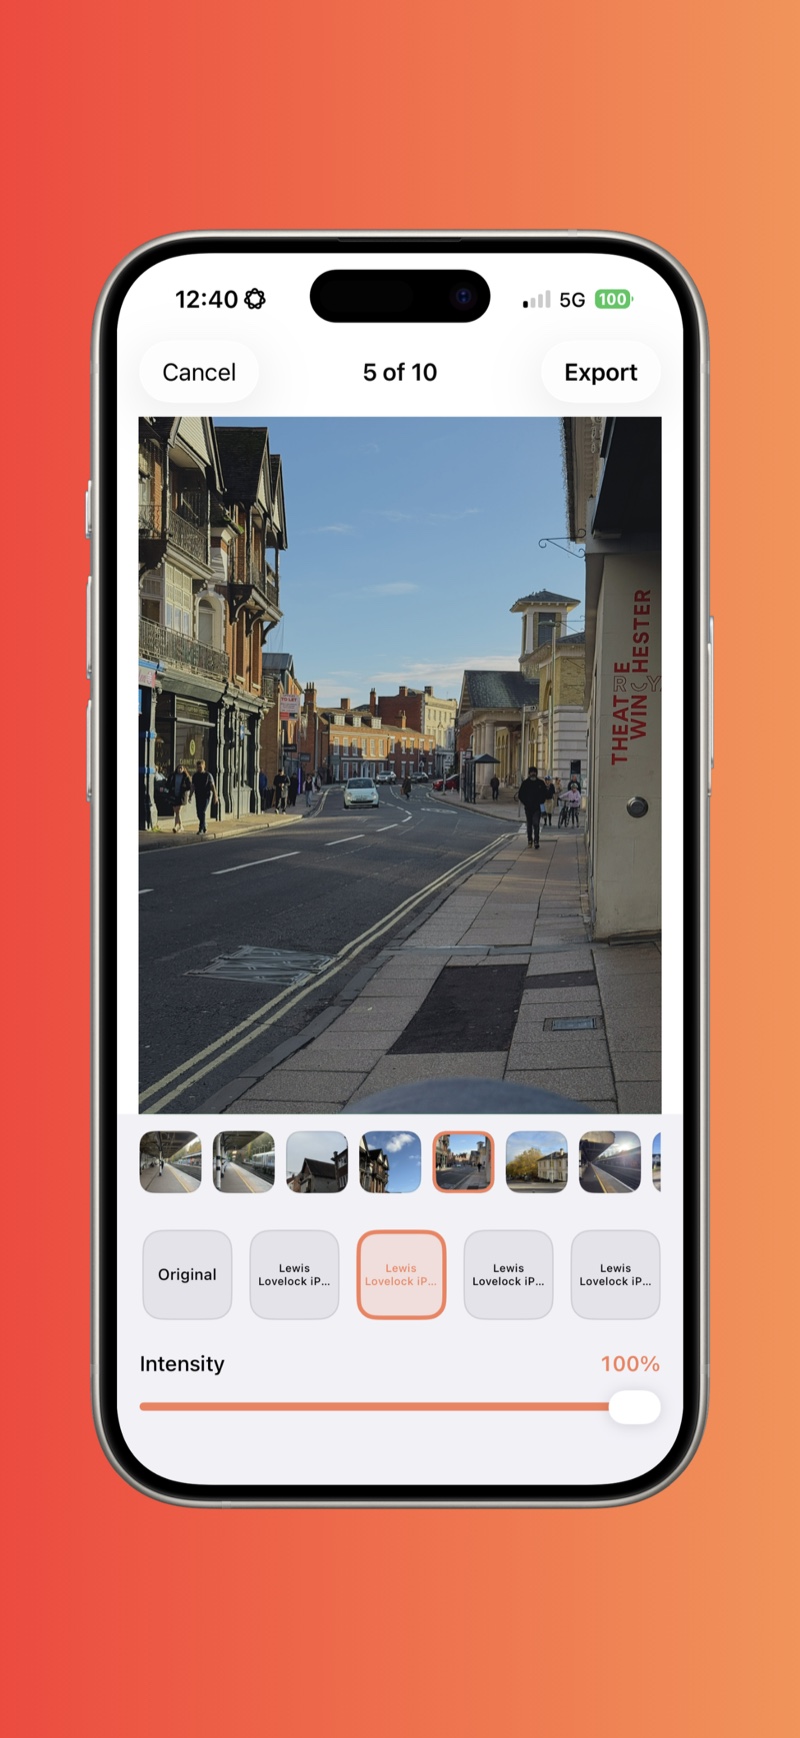
Step 3: apply one look across a set
When you come back from a shoot, you usually want the photos to share a single consistent look. Doing that one photo at a time is slow, so grade the set together:
- Import your look into RAWCraft once.
- Select the photos you want to work on, up to 30 in a batch.
- Give them your look, then adjust any individual shot that needs it.
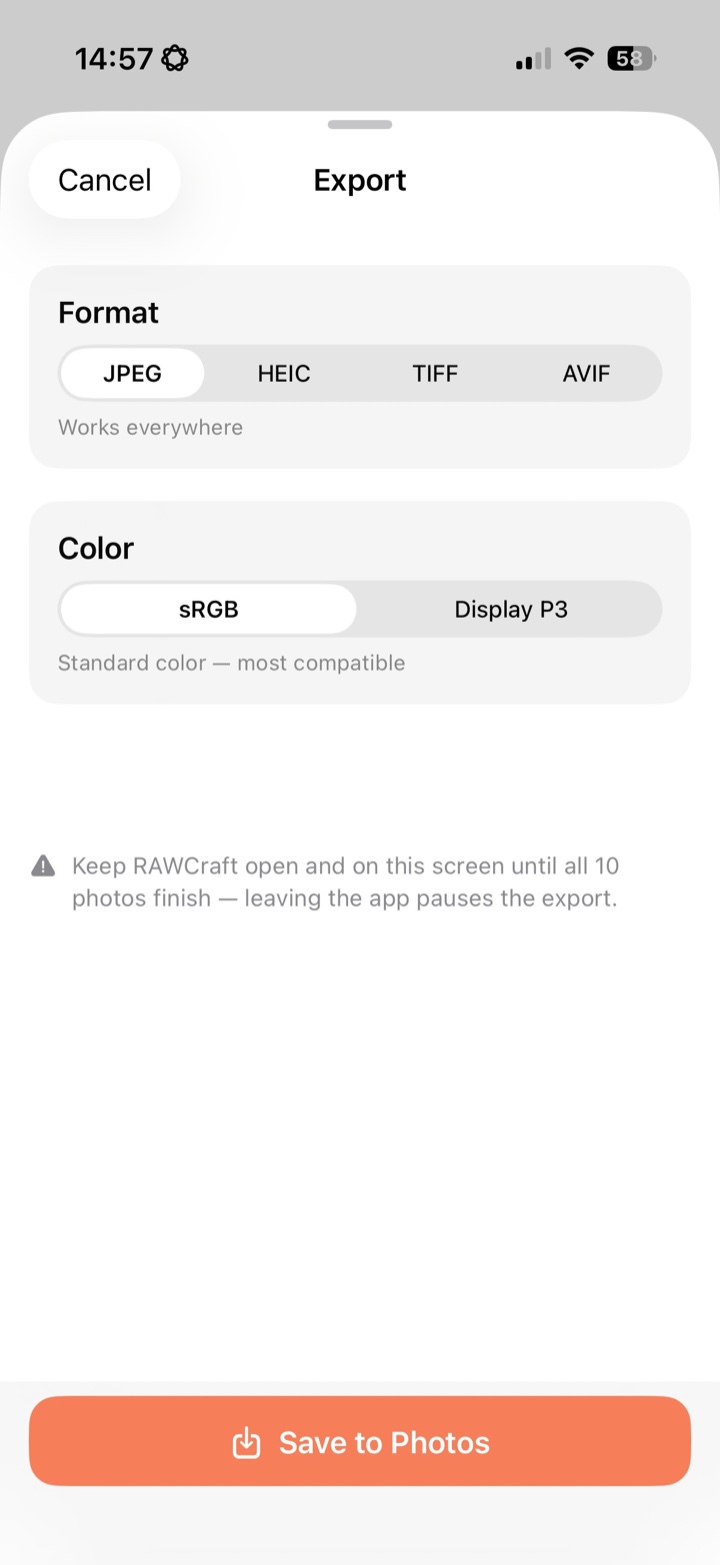
- Export the set together. The export sheet tells you exactly how many photos the look was applied to, so a batch is never a surprise.
What about Apple Photos copy and paste edits?
Apple Photos can copy edits between shots: edit one photo, tap the three-dots menu, choose Copy Edits, select the rest, then Paste Edits. It is free and built in, but it carries the Photos app's own adjustments and filters rather than a LUT or preset you imported, and it skips crop, straighten, and perspective.
ProRAW batches are large files, so keep the app open and on the export screen until the set finishes. Nothing is at risk either way: originals are never overwritten, so a batch is always reversible.
Step 4: export at full quality
Choose JPEG, HEIC, TIFF, or AVIF, in sRGB or Display P3. The export writes a new file, and your original ProRAW is never modified, so you can go back and grade the same shot differently tomorrow.
Getting the most out of a .cube file
- Shoot ProRAW for the most room. A LUT has far more to work with on a ProRAW file, where highlights and shadows still hold detail. If you have not switched it on yet, it lives in Settings, Camera, Formats, on a Pro model. Capturing ProRAW needs an iPhone 12 Pro or a later Pro, though any iPhone can apply a look to a ProRAW file it receives.
- Export in Display P3 for rich color. Modern iPhone screens show the wider gamut, and HEIC in P3 keeps files small without crushing the color a good LUT produces.
Those are the mechanical parts. For how hard to push a look, and how to keep a set consistent, see color grading iPhone photos.
When the LUT looks wrong
This is the part most guides skip. A .cube file always "works", it just remaps colors, so when the result looks bad, it is nearly always a mismatch between what the LUT expects and what you fed it.
- Washed out, flat, or milky? You have a conversion LUT built for log video footage, S-Log, V-Log, D-Log and friends. Swap it for a creative or display LUT made for stills or Rec.709. What is a LUT? covers why log LUTs behave this way on a photo.
- Garish, crushed, or neon? Same problem in the other direction, or a LUT built for HDR footage. Try the intensity slider first, and if it never settles, reach for a different look.
- Barely anything happened? Check the intensity is not sitting near zero. Some packs also include technical or correction LUTs that make a small, deliberate adjustment rather than a visible grade.
- Skin tones went strange? Strong film emulation LUTs often push oranges. Lower the intensity, or look for a "soft" or "subtle" version in the pack, which most sellers include.
- The file will not import? RAWCraft reads standard
.cubefiles (and Lightroom.xmppresets). Other formats like.3dlor.lookneed converting to.cubein a desktop tool first. - Told the LUT is missing a LUT_3D_SIZE declaration? The
.cubeformat also allows 1D LUTs, which hold a tone curve rather than a full color table. RAWCraft applies 3D LUTs only, so a 1D file is refused with that message. Use the 3D version of the look, or rebuild it as a 3D.cubeon a desktop. - Banding in skies? Export at high quality, HEIC or TIFF rather than a heavily compressed JPEG, and start from ProRAW where possible.
- The export looks flatter than the preview? Check the color space. Squeezing a wide-gamut grade into sRGB clips the most saturated colors. If you are viewing on an iPhone or a recent Mac, export in Display P3.
Quick answers
Does applying a LUT lose quality? Not in a proper photo app. RAWCraft is non-destructive: the LUT is applied at export to a full-resolution copy, and the original ProRAW file is never modified.
How do I open a .cube file on iPhone? Not the way you open a photo. It is a text file of color values, so tapping it in Files shows you numbers at best. To use it, import it into an app that reads LUTs: in RAWCraft, open the LUTs tab, pick the file from Files or iCloud Drive, and the look appears in your library ready to apply.
Can I make my own .cube LUTs? Yes, in DaVinci Resolve (free) or Photoshop: build a grade you like and export it as a .cube. Anything you create works in RAWCraft, because it is the same standard format.
How many LUTs can I import? As many as you like, organized into folders. Import the whole pack and audition looks side by side on the same photo.
Does RAWCraft come with looks? Yes, 10 built-in looks to start. Beyond those it does not sell more, so you grow the library by importing the .cube LUTs and .xmp presets you own.
Can I add grain with a LUT? No, a .cube file only moves color. Grain comes from a film-style .xmp preset that carries it, which RAWCraft reproduces as part of the look. More on that in adding film grain to iPhone photos.
Does it work on video? No. RAWCraft is photos only, and Apple ProRAW is where it is happiest.
RAWCraft is a one-time $14.99 with 10 free exports so you can try it on your own photos first.