Apple ProRAW is a raw photo format that keeps two things at once: the editing latitude of a RAW file, and the computational processing an iPhone is good at. It gets recommended constantly, usually with no explanation of what it actually is, why the photos look flat afterwards, or what you are meant to do with the files. This is the plain version: what ProRAW is, how to turn it on, how to edit it on the phone itself, and how to get a finished file back out.
The short answer on the editing part, if that is all you came for: you do not need a computer. Apple Photos opens a ProRAW and handles basic corrections, and a look-based app will apply a LUT or a preset to it and export at full quality. Either way the original file stays exactly where it is.
What Apple ProRAW is, in one line
Apple ProRAW is a raw photo that keeps Apple's smart processing. You get the editing flexibility of a raw file, a lot of color and dynamic range to push around, plus the computational work the iPhone is good at, its HDR and detail handling, baked in as a starting point rather than thrown away. Technically it is a 12-bit DNG, the open raw format, so it opens in any serious editor.
Worth being precise about one thing. ProRAW is not the same as a traditional sensor raw from a dedicated camera. A camera raw is untouched sensor data. ProRAW is computational: Apple's pipeline has already run, and the result is written into a raw container with the latitude left in. On a phone that is a feature, because the computational side is doing a lot of the heavy lifting, but the two are not interchangeable. How that difference plays out in practice, where the phone matches a real camera and where it does not, is in iPhone camera vs digital camera.
The part that surprises everyone is that a ProRAW looks flat and dull straight out of the camera. That is not a fault. It is headroom. The file is holding back its contrast and color so you can decide the look yourself.
How to turn ProRAW on and shoot it
ProRAW ships switched off, and the toggle is easy to miss.
- Open Settings, then Camera, then Formats.
- Turn on Apple ProRAW. On newer phones it is called ProRAW & Resolution Control.
- While you are there, set the default resolution, 12MP or 48MP.
- In the Camera app, tap RAW at the top to switch it on for a shot. It reads RAW MAX at 48MP. It stays on until you turn it off, so check it before anything important.
A few things worth knowing:
- You need a Pro iPhone. ProRAW capture is available on the iPhone 12 Pro and every Pro model since. If the option is not in Formats, your model does not support it. Any iPhone can open and edit a ProRAW file it receives.
- 12MP or 48MP. 48MP holds more detail and produces much larger files. 12MP is plenty for most photos.
- The files are big. A ProRAW DNG usually lands somewhere between 25 and 75 MB, depending on the resolution and how much detail is in the scene. Worth it when you plan to edit, overkill for a receipt.
ProRAW is the most important toggle, but it is one of a handful worth changing before you shoot. The rest, resolution, grid, exposure habits, Preserve Settings, are in the best iPhone camera settings for photos.
How to edit a RAW photo on iPhone
Editing a ProRAW always starts with the same step, whatever app you use: developing it. A 12-bit DNG is not a finished picture, so something has to turn that data into a viewable image, and until it does, nothing has committed to a final contrast or color. That is where the extra room comes from. A baked HEIC has already made those decisions for you and cannot take them back.
On the phone there are two honest ways to do the developing. Apple Photos opens a ProRAW natively and develops it slider by slider, which is fine for exposure, highlights, and a straighten. A look-based app develops it and lays a saved color recipe over the result in one move, so the same decision lands on every photo from the shoot.
The look sits on top of the developed file, which is why a LUT reads differently on a ProRAW than on a normal photo: there is more underneath it to move. For a comparison of the editors themselves, Apple Photos, Lightroom, Darkroom, and RAWCraft, see iPhone RAW photo editor. For what a saved recipe is, see what a LUT is. The mechanics of getting .cube files and Lightroom .xmp presets onto your phone live in their own guides, and the creative side, which grade to reach for and why, is in how to color grade iPhone photos.
Where RAWCraft fits
RAWCraft only does the second route: it develops your ProRAW and applies a look you already own. You bring the .cube and .xmp files, tap one, and set its intensity. Each photo keeps its own look, and nothing carries forward, so a photo you leave alone is still developed on export, it just goes out with no look on it. The step-by-step is in how to apply a .cube LUT to a photo.
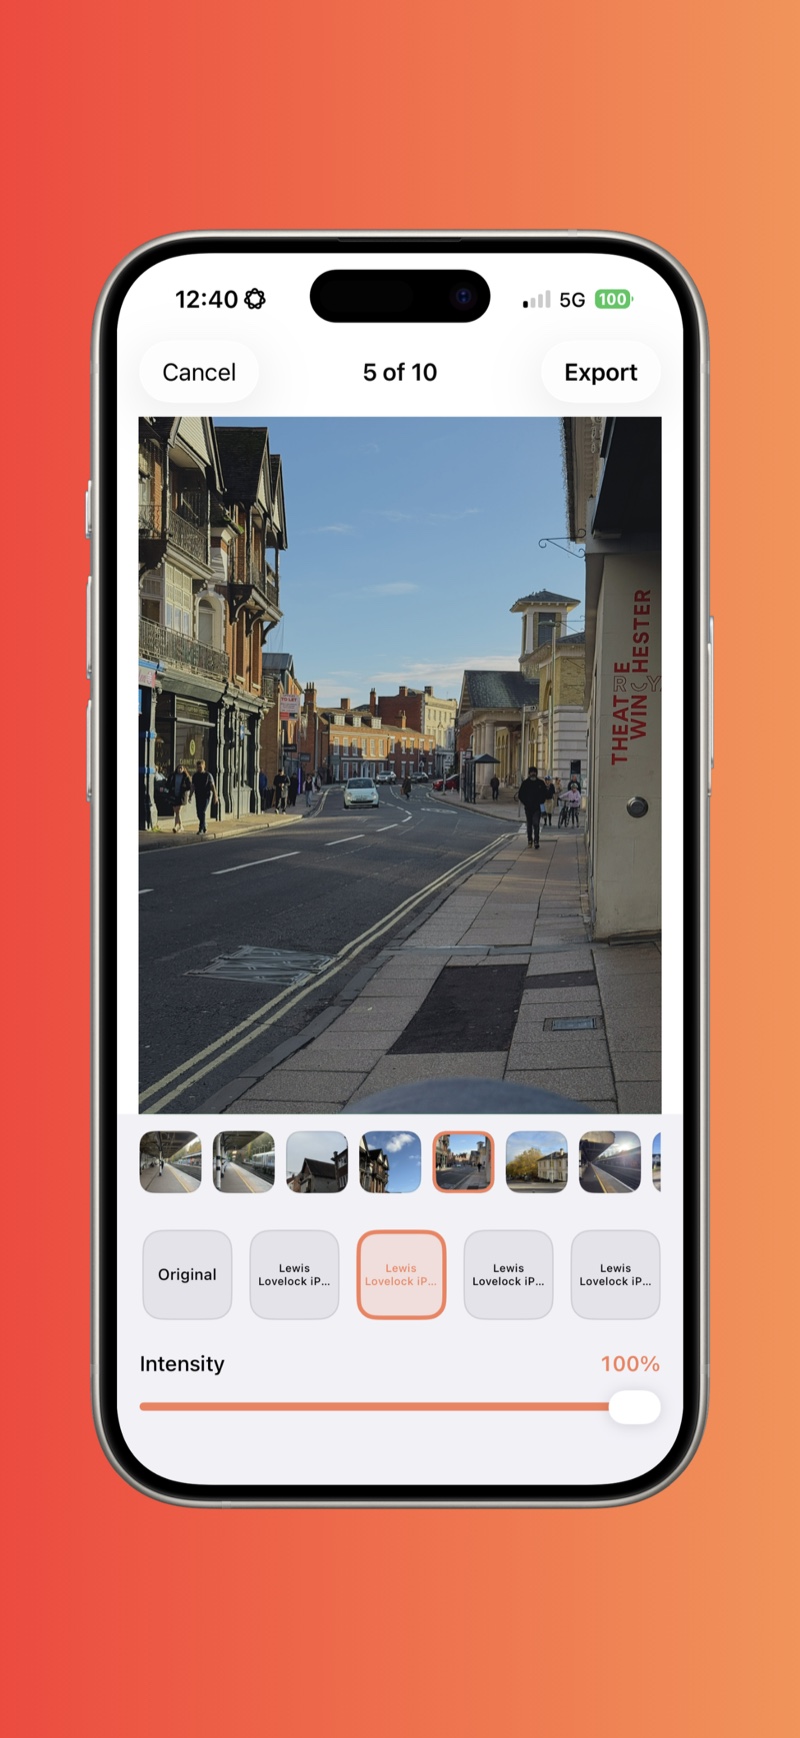
It is deliberately narrow, photos only and one look at a time, but it ships with 10 built-in looks, so you can start straight away and add your own .cube or .xmp files as you go. The best LUT apps for iPhone photos sets out where a different tool is the better trade.
How to export a ProRAW
A ProRAW holds more color than most export formats can carry, so this is the step where a raw workflow either keeps its quality or quietly throws it away.
- Display P3, not sRGB, when you can. ProRAW captures wide-gamut color and a modern iPhone screen can show it. Exporting to sRGB clips that back to the narrower space, which is the usual reason an export looks flatter than the preview did. sRGB is still the safer choice when the photo is heading somewhere old or unpredictable.
- TIFF when the photo has more work coming. It carries the most data of the four formats, which matters if the file is going on to a desktop editor. JPEG, HEIC, and AVIF are all finishing formats.
- The original DNG never changes. A new file is written every time, so the ProRAW stays in your library exactly as shot and you can re-grade it later from the same starting point.
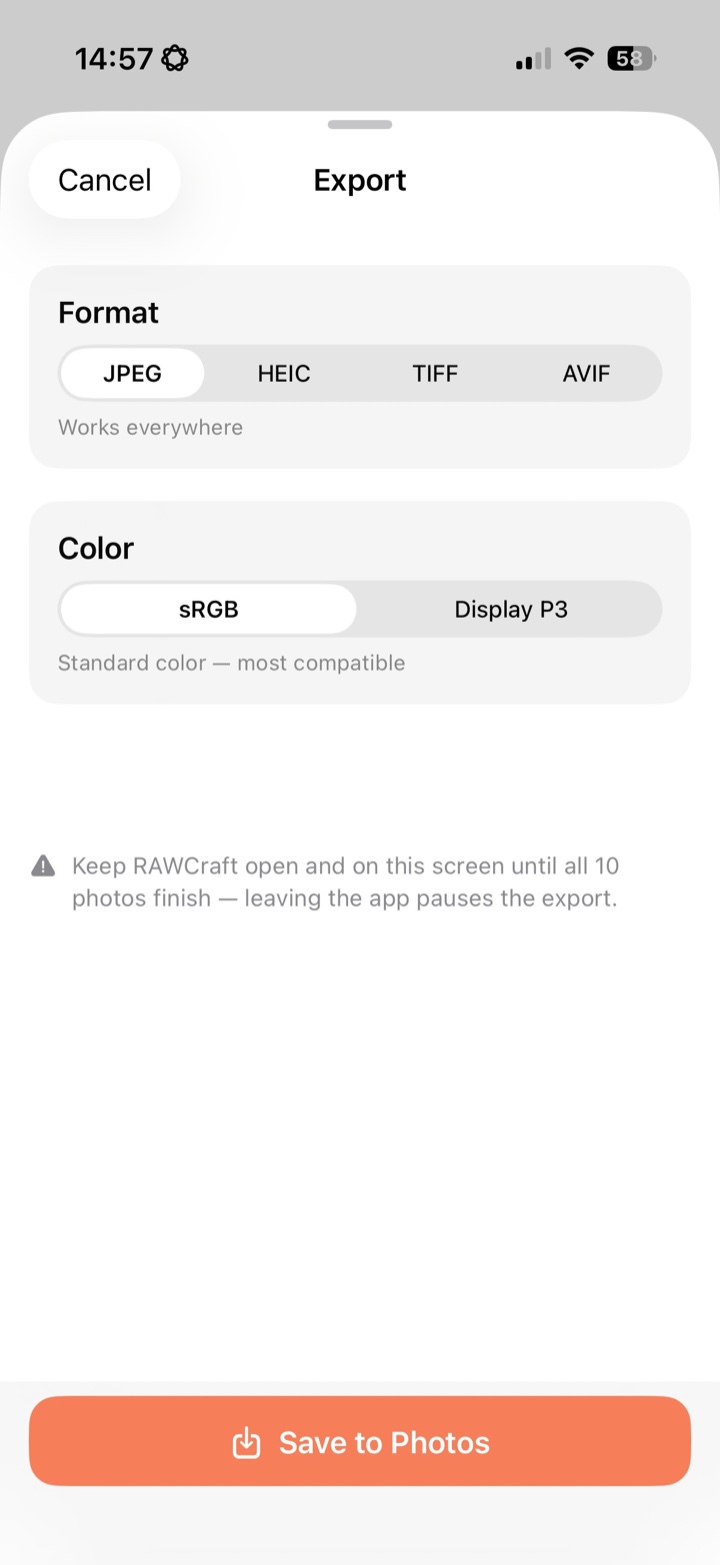
All of it runs on the device: no account, no upload, nothing leaving the phone.
ProRAW vs RAW vs HEIC
Three formats, three trade-offs:
| Format | What it is | Good straight away? | Editing room | File size |
|---|---|---|---|---|
| HEIC (normal photo) | Finished and baked | Yes | Little | Small |
| Traditional RAW | Pure sensor data, no processing | No, often worse | Huge, but from scratch | Large |
| Apple ProRAW | Raw latitude plus Apple's processing | No, flat on purpose | Huge, from a better start | Large |
Traditional raw is in the table for context rather than as a choice your iPhone offers. The real decision is ProRAW or HEIC, and it comes down to one question: are you going to develop the file or not.
Is ProRAW worth it?
It depends entirely on whether you edit.
- Shoot ProRAW when the photo matters: high-contrast scenes, low light, or anything you intend to edit, print, or put a look on. This is where the extra latitude rescues a blown sky and lets you restyle the color without the image falling apart.
- Skip it for quick snaps, receipts, and selfies. The files are large, and a normal HEIC already looks great with no work at all.
If you never open an editor, ProRAW is wasted on you and HEIC is the better choice. The moment you want control over the final look, ProRAW gives you room that a finished HEIC simply does not have.
Quick answers
Can you edit RAW photos on an iPhone? Yes, on the phone itself. Apple Photos opens a ProRAW for corrections, and a look-based app applies a LUT or preset and exports at full quality. No desktop involved.
Which app should I use to edit ProRAW on iPhone? iPhone RAW photo editor compares Apple Photos, Lightroom, Darkroom, and RAWCraft on exactly that question. The short version: Apple Photos for quick corrections, Lightroom or Darkroom for deep RAW edits, and RAWCraft when you already own the LUTs or presets you want on the file.
Is ProRAW the same as RAW? Not quite. A traditional raw is untouched sensor data. ProRAW is a 12-bit DNG with Apple's computational processing already applied, so on a phone it starts from a much better place.
Does ProRAW take better photos? Not automatically. It captures more data, not a better picture. Its advantage is everything you can do to it afterwards.
Which iPhones shoot ProRAW? The iPhone 12 Pro and every Pro model since. A newer non-Pro iPhone does not shoot it. Any iPhone can edit a ProRAW file it receives, but capturing one needs a Pro.
Why do my ProRAW photos look flat? That is the headroom described above, not a fault. Apply a LUT or preset and it comes to life, and add a little film grain if you want it to feel shot rather than processed.
RAWCraft is a one-time $14.99 with 10 free exports so you can try it on your own ProRAW photos first.